Why Fusion?
Crafted by Jennylyn Pringle, a seasoned entrepreneur and DIY expert with over two decades of experience, Fusion Mineral Paint offers a premium painting solution with its unique formula. Featuring 100% acrylic resin, this paint boasts the highest grade strength in the market, delivering exceptional results for furniture painters. Its environmentally conscious formulation, superior durability, and easy one-step application with a built-in topcoat make it a top-performing choice for any project.
Fusion Mineral Paint was designed with you, the consumer, in mind. Our smaller container sizes are perfect for your project needs and help to lower costs and reduce waste. Despite our fair prices, we never compromise on quality, offering you a high-quality product that is based on over 20 years of industry expertise. At Fusion, we are committed to always delivering the best.
All Fusion™ products are non-toxic, lead free, virtually odourless, and contain no ammonia or formaldehyde.
Fusion™ Mineral Paint is designed for easy application and can be used on a variety of surfaces without the need for extensive preparation or priming.
Fusion™ Mineral Paint is perfect for both beginners and experts, as it’s easy to use and can be applied to a wide range of surfaces without requiring primer. Plus, its unique formula features a built-in topcoat, making it even more convenient. Unleash your creativity with this versatile product!
With Fusion™ paint, achieving a full coverage in just one coat is possible thanks to its high-quality formulation. Each pint (500 mL) provides coverage of up to 75 sq ft, making it an efficient and cost-effective choice for your painting projects.
Fusion™ paint dries to a highly durable and washable finish thanks to the industrial-grade acrylic resin in its formula. This gives the paint a slight flexibility that can accommodate the movements of furniture, flooring, kitchen cabinetry, and more, ensuring no chipping or cracking occurs.
Fusion™ delivers stunning results with its matte finish, providing a smooth and virtually brushstroke-free surface with its low reflectance value.
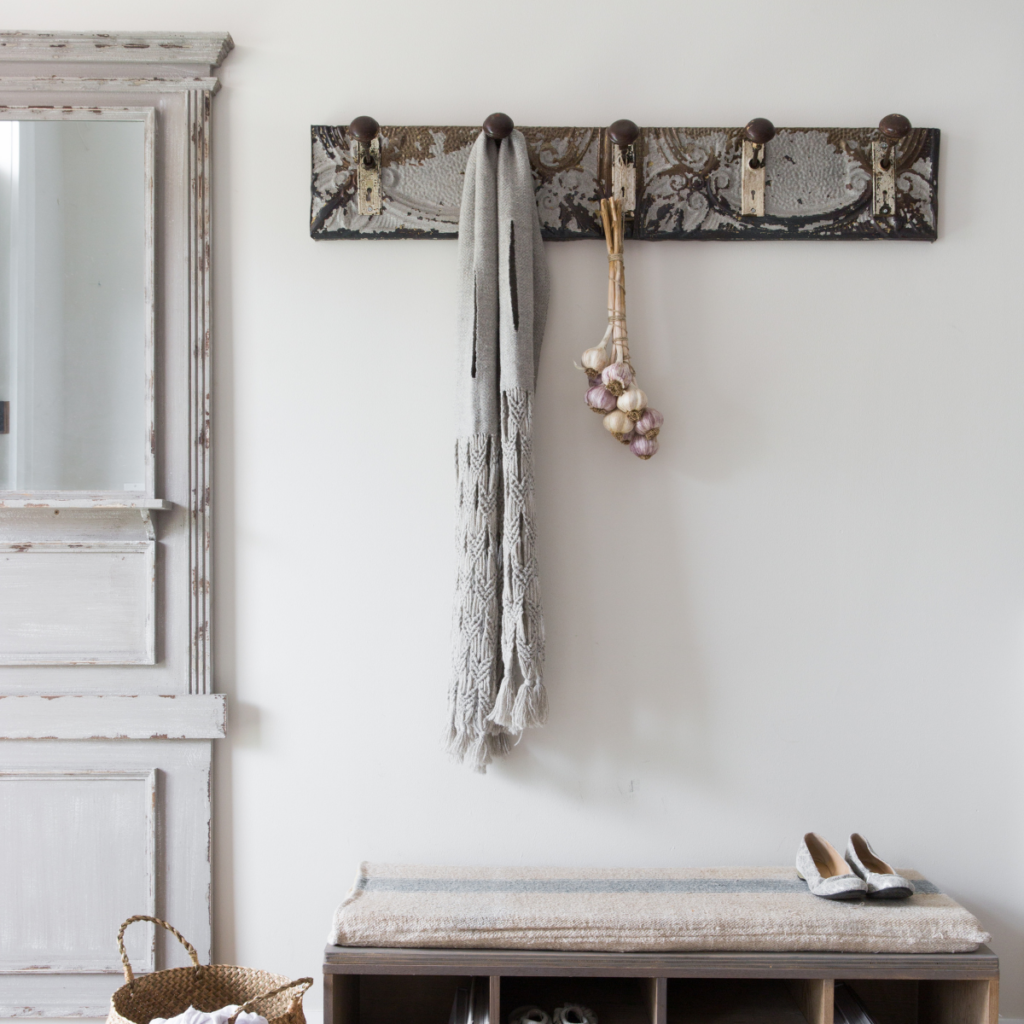
With a range of over 50 beautiful hues to choose from, the Fusion™ true colour fan deck is the perfect inspiration for your next project. Featuring customer favorites from the past 30 years, as well as custom blend recipes for unique shade variations, you’re sure to find the perfect color for your space.
Prep
Preparing your furniture is an important step in ensuring a successful painting experience. It may seem daunting, but it’s actually quite simple and straightforward. Before you begin, it’s important to assess your furniture and determine what, if any, prep work is required. This may include a simple cleaning, or it may involve more involved steps like sanding and priming. The key is to follow the right steps in the right order to create a strong foundation for your paint to adhere to and last for years to come. For more detailed information and guidance, check out our helpful blog post and video on the subject.
Most of the time all you will need to do is
CLEAN -> PAINT
However depending on your particular piece/ surface and previous coating, you may need the following to be thorough.
CLEAN -> REMOVE WAX ->LIGHT SCUFF SANDING ->PAINT
CLEAN
Using Fusions TSP Alternative, this will remove any grease, or dust, making sure that your piece is ready to accept paint.
REMOVE WAX If you’re painting an old heirloom piece of furniture, it’s possible it had a wax coating for protection applied a long time ago. You will want to remove any Wax on your piece using Odourless Solvent. If you suspect your piece has wax, you can usually tell by giving a light sanding to it and if the sand paper gums up and you’re getting wax building up, you will want to stop and remove the wax using Odourless Solvent (Mineral spirits)
LIGHT SCUFF SANDING
Sanding is only necessary on high gloss finishes or when you are trying to remove stubborn coatings such as Teflon or fire retardants.
PAINT
Paint it beautiful! Pick any one of our gorgeous colours, be inspired and paint it!
NO PRIMING NECESSARY – Most of the time
When painting with Fusion Mineral Paint, you do not typically need a primer. However, if you are trying to prevent bleed through from knots or tannins in the wood, it may be necessary to use a tannin blocking primer like Zinsser BIN Shellac-based primer.
If you are painting a dark surface and want to switch to a bright white color, consider using a lighter mid-tone color as a transition, such as Sterling, to make the switch easier. To block bleed-through from specific wood species, such as mahogany, you may need to apply one to two coats of Zinsser BIN, or even pure Shellac. Keep in mind that Zinsser BIN is white, so it may affect the final look if you plan on distressing the piece.
With Fusion Mineral Paint, you can give new life to a variety of surfaces, from furniture to plastic, metal, glass, and even fabric. Ensure to follow the necessary preparation steps, even if the surface is previously painted or varnished. In the case of melamine and Thermofoil surfaces, like most Ikea cabinets, using Ultra Grip as a primer can provide an extra adhesive bond for Fusion Mineral Paint to adhere to the surface. Get more information on Ultra Grip here.
Definitely! To get the best results, it’s recommended to clean the surface with a TSP Alternative cleaner and if it’s a glossy oil-based coating, give it a light sanding. With these steps, Fusion Mineral Paint will adhere perfectly!
* Do not scuff sand if you think it is Lead based paint.
Clean using Fusions TSP Alternative
To ensure long-lasting results when painting furniture, it is essential to clean the surface before applying paint. Fusion Mineral Paint recommends using their TSP Alternative, a safe, easy-to-use, and efficient cleaning solution. Simply add 2 capfuls of TSP Alternative into a liter of water to create the best cleaning solution. This no-rinse formula removes oil, grease, fingerprints, stains, and other contaminants, improving adhesion and the look of subsequent coatings. The highly concentrated formula allows for excellent value from one bottle. Clean the entire piece until no more dirt comes off and the surface feels squeaky clean. Then let it dry before painting!
Before you do any painting, you will want to remove any Wax on your piece.
If you suspect your piece has a previous wax coating, you can usually tell by taking a light sand paper to the surface and if the sand paper gums up and you’re getting wax balls building up, you will want to stop and remove the wax using Odourless Solvent (Mineral spirits).
You can also take your fingernail and drag it across to see if anything builds up under your nail, if so it is probably wax and needs to be removed using Mineral Spirits or our Odourless Solvent.
Use Methylated Sprits
Apply it onto a cloth, then gently rub your furniture to remove the wax. This will dissolve the wax to help it come loose from the surface and onto your cloth.
It removes waxes from surfaces for prepping furniture. It cleans used wax brushes. Can be used to remove sticky residue from price tag stickers and more. It’s just a great PREP product to have on hand at all times.
It’s never a bad idea after cleaning with TSP Alternative to give a light suff sanding, however it isn’t necessary. When you scuff sand it allows more for the paint to grip onto. It is necessary on high gloss finishes or when you are trying to remove stubborn coatings such as Teflon or fire retardants.
For a glossy piece of furniture, a light scuff sand with medium / fine grit to de-gloss surfaces would be wise. It is important you only sand a clean surface. You should also sand any rough spots to ensure a super smooth paint finish. If you think this could be old lead paint, do not sand, as lead particles are toxic.
No. Fusion is self priming.
If the colour you are using is fairly similar to the existing finish, or if there are no stains, knot holes, or other issues, go right ahead and paint!
If your project is dark and you are wanting to go to a bright white colour, consider using a transition colour such as Sterling for your first coat. These lighter mid-tone colours will act as a colour transitioning primer and make the switch to pure whites easier.
Light over dark is very typical these days, we all want that fresh clean look and what better way to brighten up a space than with a fresh coat of an off white or crisp white paint!
You can use a Transition coat if going from a very dark surface to a light colour. We recommend Sterling, a basic grey to help. One coat of that, and then go ahead with your lighter whites for less coats required over all. Don’t panic if your first transition coat is virtually transparent. The additional thin coats will work wonders. Refrain from overloading your brush and applying more paint for “better coverage”. Fusion Mineral Paint works best when applied with thin coats to avoid brush marks. A little bit of Fusion Mineral Paint goes a long way!
The number of coats you need to apply depends on the colour you start with. Here is some more info of the best tips from Jennylyn creator of Fusion Mineral Paint: Watch Now
Bleed through is when the wood tannin’s show through your paint. This happens with woods like Mahogany or Cherry typically. This will happen to any and all paints, the only way to stop it is by using a tannin blocking primer.
To block out bleed-through from specific wood species such as mahogany, we recommend one to two coats of a Shellac-based primer like Zinsser BIN! It is white, so keep this in mind if you plan to distress your piece as you may need to reconsider the distressing technique. For extra troublesome wood knots apply pure Shellac, followed by Zinsser BIN, then apply Fusion Mineral Paint™. If pure Shellac is not available, ensure to use 2-3 coats of Zinsser BIN on the knots.
Ultra Grip™ makes painting the impossible, possible! It is rarely ever needed as Fusion Mineral Paint can adhere easily to most surfaces such as glass, plastic, metal and more without a special primer or Ultra Grip.
It is typically used on Melamine, Laminate, Thermofoil and highly detailed high gloss areas that can not be scuff sanded.
You will know if you need ultra grip by doing a simple test. Try to apply a small amount of paint to your surface. If you get lacing, paint separating, this is the effect that you will see when paint is unable to adhere to a surface.
When required, apply a very thin coat of Ultra Grip™ after you have cleaned your surface and lightly sanded where possible. Ultra Grip™ is a milky white colour, but dries clear. Allow Ultra Grip™ to dry for 12 hours, then continue with Fusion Mineral Paint™. *** Caution*** Ultra grip should be applied with a very thin application as it easily holds texture. We recommend a sponge for application or a micro-felt roller., of a fine quality brush with a very thin application.
WHAT IS ULTRA GRIP?
It is considered an ultra adhesive primer and allows for Fusion Mineral Paint™ to adhere to surfaces that are typically not for painting, such as melamine or thermo-foil. Fusion™ adheres well to clean most plastics, metal, and glass without requiring this additional step.
Ultra grip only comes in 500ml which covers approx 75 sqft. If you have an already existing finish, you probably don’t need Ultra Grip. Fusion works very well on previously finished surfaces with proper prep. A really good clean and a good scuff with sandpaper will be acceptable for good adhesion.
To prep like a pro check here
How to use Ultra Grip check here
95% of the paint jobs will never require a primer. The only time you need a primer is to stop bleed through if there are knots. To seal those, use a Shellac based Zinsser primer.
You may need to use our Ultra Grip is painting a super slick surface such as melamine or Thermofoil, it acts like an ultra adhesive primer for very difficult surfaces.
Brushes
Natural bristle brushes such as the Staalmeester natural series and the Staalmeester original series provide a more textured finishes. Fine quality synthetic bristles provide a smoother finish such as the pro-hybrid series and the One Series Staalmeester. You should pick a brush based on your project.
Large Projects. Walls, ceilings, floors, large tables, or doors, the Staalmeester® wall brush, large flat brush, One series ‘spalter’ or microfiber paint rollers are the perfect choices.
Small/Medium projects Window frames, dressers, cabinets or railings, the Staalmeester oval brush, round brush and One series decoration ‘spalter’ brush are the perfect choice.
Detailed projects: Detailed furniture edges and shaped profiles such as railings, window frames, spindles, and ledges, the Staalmeester® pointed sash brush and bended brush are a must-have.
If you’re struggling with brush strokes, the biggest culprit is too much paint on your brush, using the wrong type of brush, or the temperature/humidity isn’t working in your favour. If your brush has too much paint on it, it will leave brush strokes. Remove excess paint. Less is more. Even a small amount of paint will offer excellent coverage. Apply 2 thin coats for best results. If you’re still struggling with brush strokes add our Extender to increase your working time. You can also try rolling the paint instead. If the climate is dry, your paint will start to create texture almost immedaitely upon application. Be sure to add the Extender to avoid this. The ultimate key is less is more, and using a high quality synthetic brush. Learning how to avoid brush strokes while painting is a slight learning curve, these tips and this video should be quite helpful!
Don’t hold the paint brush around the handle like a hammer. Hold it at the metal piece, also known as the ferrule, and let it balance between your palm and fingers. That way you get a fluid movement from your wrists. Place it on your hand and feel the pressure – you aren’t so much controlling the brush as you are helping it glide. Most people often add too much pressure and too much paint, resulting in visible brush strokes. Less paint is easier to control!
Paint brushes usually come in either synthetic or natural bristles. Synthetic bristles are great for allowing paint to glide off the brush and apply smoothly. Synthetic bristles can be thick to ultra fine and depending on your application you would choose accordingly. These are ideal for our paint! Natural bristles are made of various types of animal hair which allows the brush to hold more paint product. These are ideal for Milk Paint, SFO stains, applying waxes and also for our newest product Gel Stain and Topcoat. Interestingly, nature bristles hold humidity, which is also ideal for when working with water-based paints such as Fusion™. They are also coarse, ideal when wanting to achieve texture in your application when using paint with a heavy body. In addition to these two types, Staalmeester® also has a special blend of both synthetic and natural bristles, which achieves the benefits of both types.
The type of project you are working on usually tells you which type of brush will give you the best application. Flat or angled brushes are great for beginners, as they can cut into edges as well as cover large, flat areas. Our flat and angled brushes have bristles that feather to a super thin edge, which means the bristles touch the surface less and you get less brush strokes. Flat brushes are also fantastic for stain and varnish applications. Round brushes are great multi-use brushes. They get into detailed areas and can smoothly cover flat areas, with proper technique. We have round and oval brushes that are great for an all-purpose brush. Some of the more specialty brushes include our wall brush, which is a giant flat brush that is great for painting walls by hand (especially if you want to add some texture!) or applying the Gel Stain and Topcoat to large flat surfaces such as tabletops. Our pointed sash brush is phenomenal for painting inside edges and corners.
Caring for your Brush Staalmeester® brushes are an investment, we want to help make sure they last a lifetime. When using a brush for the first time, there may be the odd loose bristle, which can be easily removed by swirling the bristles around on your hand.
Even though Fusion™ rinses out with water, we recommend using our Brush Cleaner to get out the last bits of paint and condition the bristles. The Brush Cleaner can be used for all types of brush hair. It’s also great for cleaning hands, floors, and work surfaces. It is 100% natural, non-toxic, linseed oil soap. To use, lather your hands or tools with the soap, and rinse with water.
We recommend that you do not dry brushes with the bristles facing up. Water will soak into the brush and can ruin the bristles. The best solution is to hang your brush on a hook using the hole in the handle.
We have an amazingly easy to use all natural brush soap cleaner made from linseed oil. It’s beautiful on the bristles of your brush, not only does it clean, it also conditions the bristles.
Watch this video to see how it works.
Paint
Many are often blown away by the coverage of Fusion Mineral Paint!
1 Pint can often cover several pieces of furniture!
Painting your kitchen cabinets? Plan on 3-4 pints in total!
This link will show you how much coverage you can get with Fusion Mineral Paint.
With over 50 stunning colours, you’re bound to find one that suits you!
Our beautiful Fusion colour card is painted to ensure you get an accurate depiction of each of our stunning Fusion Mineral Paint colours.
You may also want to grab a Fusion Fan deck! This Fan Deck of large colour swatches has our entire collection including the metallics. Don’t see the exact colour in the Fusion range you’re looking for? There are also 50+ easy to follow recipes showing brand new colours. It accurately depicts 114 colours to help you choose for your project and Paint it Beautiful™. A handy size of 2″ x 5″ this Fan Deck is the perfect colour choosing tool, especially when picking fabrics, comparing shades, finding matches to existing projects, etc.
The descriptions and colour pairings on the back of each colour offer you inspiration to let your creativity run wild.
We have created custom colour recipes so you can achieve a range of colours outside of the current FUSION™ offering. We have two types of recipes that are easy to follow along!
Our paint is a water-based non toxic paint, that doesn’t have VOC dries in it. It takes 21 days for the paint to cure properly and be it’s toughest. It can be touched up if there are any scuffing, during the 21 day cure time, be sure to treat your project gently.
Dry time is usually 30 minutes – 2 hours. After this point, you can add another coat.
Click here for more information about cure time vs dry time.
It’s best if you can wait approximately 30 minutes – 2 hours before applying another coat of Fusion Mineral Paint. The paint needs a good amount of time to dry before applying another layer over top of it. If the temperature and humidity is very neutral, and the paint is drying well, you could re-coat in 30 minutes. If you start to re-coat and notice you’re pulling up the base layer and activating it with your second coat, then wait a little longer.
Depending on how many coats of paint you applied, and what type of top coat you will be choosing, you maybe want to wait 8-12 hours before adding a top coat. To be safe, giving the paint more time for the water to evaporate, before adding a top coat such as Stain & Finishing Oil, or Gel Stain and Top Coat. If wanting to apply a Furniture Wax, just wait 1-2 hours once the paint is dry to the touch and you can apply it at that time.
If you have waited a long time, like weeks to top coat, go ahead and add your additional coat at any time, there is no limit to when you can apply it.
It’s perfectly normal for different colours to be a slightly different consistency
Each and every ingredient in our formulation is carefully selected, evaluated and tested to the strictest quality control measures to ensure a superior performing paint. Each batch goes through rigorous quality control ensuring that the paint will not separate or harden in the container for 7 years. We are able to achieve this by using only the best available ingredients on the market. Our formulation is 100% uniquely ours, formulated from the ground up with each colour having a slightly different consistency and weight depending on the wonderful mineral pigment used. Click here for more information.
It’s perfectly normal for different colours to require different coats for coverage.
For a purer pigmented color such as Fort York Red, Renfrew Blue, Liberty Blue etc these pigments offer vibrancy, but not the best coverage. These colours do not have the heavier covering pigments in them like iron oxides, this would greatly affect the colour making it duller and less vibrant and pure. It’s a bit of a trade off – pure more vibrant colors, however more coats are required. Typically 3 coats is required for these types of colours.
You can add a base colour under to help out. if you happen to have it on hand- if not don’t worry about it, just apply an extra coat of your colour! It will cover well after several coats. Fort York Red – try 1 coat of Cranberry underneath. Liberty Blue or Renfrew Blue – try 1 coat of Homestead Blue or Ash underneath. Whites also require about 3 coats for solid coverage. You may wish to apply a coat of Sterling a mid tone grey wen going from a dark surface to a lighter one to cut down the number of coats of white needed. Mid tone and dark colours are usually 1-2 coats tops. These colours have a lot of great covering iron oxdies which is why they need less coats.
Application Technique
Dip your brush into the paint a maximum of halfway up the bristles.
Don’t use too much paint. It is better to paint one or two thin layers rather than one thick layer. If you see brush strokes, you have too much paint on your brush.
To avoid start and stop marks or inconsistency, paint from one end to the other, without starting and stopping half way through.
Don’t brush back and forth too much as the paint will start to dry, as it dries your brush will create texture, aka brush marks.
Use the right tools for the project and use the right size brush for your project.
Larger projects require a larger brush or roller, or combination of both.
Small projects require a smaller brush.
Sanding between layers with a fine grit of sandpaper will help to even out any brush strokes and give you smooth finish.
For an even smoother finish, wet the sandpaper and do a wet sand. Make sure you wait at least half an hour for the paint to be dry to the touch! If doing a wet sand to only make it smooth, it is best to wait several hours unless you purposefully want to distress it. Wet sanding too soon can go right through the new layer of paint just applied.
If you struggle with brush strokes, or have a large surface, a high quality Staalmeester Micro-felt roller is your best friend.
Dip the roller into the tray and roll the excess paint off. Don’t use too much paint and don’t apply too much pressure on the roller because this will result in roller marks.
Roll in one direction, following the woodgrain, so you get an evenly painted surface.
For the ultimate smooth finish, glide the One Series Flat #10 across a still-wet surface to smooth out any remaining texture in the paint.
Don’t go back and forth too much when the paint is drying as you will create texture. If you see an orange peel texture, you have too much paint on your roller.
TIP: When you have finished one coat you can put the roller into an air tight plastic bag. This stops the paint from drying. This way you don’t always have to rinse out your roller when using the same colour on subsequent coats.
Weather can affect dry times. Try to avoid painting on extremely humid days or days with extreme temperature changes or even very windy days to avoid paint splatter! Do not paint below 10ºC / 50ºF Do not paint above 30ºC / 86ºF
Paint and coatings should be applied in this order for proper adhesion.
Water-based (Fusion Mineral Paint and most accents) –>Oil–> Wax
Distressing
Distressing a piece of furniture makes it look worn and old – but on purpose! It is done by removing some of the paint, especially in areas that would be prone to a lot of wear and tear (handles on drawers, the seat of a chair, etc.)
Fusion™ is made from 100% acrylic resin. This is what makes it more durable than most other paints and gives it that built in top coat. Therefore, distressing becomes more difficult the longer it is left to dry., be sure to do your distressing shortly after painting, just as it is dry to the touch.
See below for great tips on how to achieve the perfect look with our Beeswax Distressing Block or the wet sanding technique!
Perfect your distressing technique with our 100% pure beeswax block. Take control of your finished look with ease and style!
HOW TO USE IT
For exact placement of distressed lines and edges, press the wax along the edges where you would like to see the distressed antiquing effect between layers of paint. Simply rub the wax block in the areas you want the paint to look distressed. Anything that is applied on top of the waxed areas will easily distress with a little bit of sanding.
You will notice this resistance once you are giving your piece a light sanding at the end of your application of all layers of paint. The paint underneath the wax will remain in place, and any paint applied on top of the wax will come off effortlessly, allowing for the perfect distressed look.
Wet sanding is an amazing and easy to use technique to remove brush strokes and give your piece finish the smoothest feel ever!
How to wet sand: allow the paint to dry for at least a day. Spray with water, then take your wet sanding sponge of at least 600 grit and in circular motions, gently start to rub the surface.
You will see a bit of the paint pigment colour coming off onto the sand paper. Take a dry rag and wipe back. Continue to your desired look and feel. You can wet sand very lightly between each coat of paint you apply to really reduce brush strokes. For distressing, use the same technique but with more pressure.
Finish
No! Fusion has a very durable built in top coat. It is stain proof and water resistant. It is a washable finish once cured.
On high traffic areas you are welcome to add an additional top coat to increase the sheen.
Due to the nature of the matte finish, sometimes darker colours can pick up more dust from fingers, leaving marks behind. Simply wash away with a damp cloth, or add a top coat such as our Beeswax Finish ( all natural beeswax & hemp oil blend) , Furniture Wax or our Stain & Finishing Oil in Natural for a deep rich effect.
If applying a top coat over dark colours, be sure to use an oil based finish like our Stain and Finishing Oil.
If applying a top coat over a light colour or white – we recommend using our non-yellowing water-based Matte or Glossy Tough Coat.
We have many top coats to choose from, be sure to read through each of them to see which is best for your project. Everything you need to know about Top Coats is in this video!
Fusion Mineral Paint is made with the finest quality of ingredients, and the highest grade resins boasting a highly durable built in top coat – meaning your piece will be very durable for everyday use, however, sometimes adding a little extra protection for ease of mind. FMP is stain and water-resistant. Dries in 30 minutes for light use, cures in 21-30 days for maximum strength. For regular maintenance and cleaning, a mild soap and water is recommended. When cleaning this matte finish, if you are too rough with the surface you may burnish it, which increases the sheen however creates inconsistency in the finish. Good to know, due to the nature of matte finishes, they tend to show dust specifically on darker colours, increasing the sheen will alleviate this from occurring.
The easiest product to use to richen up a dark colour, we recommend our Beeswax Finish ( all natural beeswax & Hemp oil blend) https://fusionmineralpaint.com/products/finish/beeswax-finish/
Stain & Finishing Oil add a beautiful sheen to your dark colours. Use the Natural ( colourless ) or the Ebony is going over black for an even more intensified black. https://fusionmineralpaint.com/products/finish/stain-finishing-oil/
Our Water-based Tough coat in Matte or Glossy can be applied as long as applied very thinly. If applied too thick, it can go cloudy. So apply sparingly.
Our Water-based non-yellowing Tough coat in Matte or Glossy will not yellow your whites.
It is not recommended to use our Stain & Finishing Oil over whites as they will slightly yellow.
High traffic areas: Dining Table Tops, Flooring, Cabinetry. Areas that require lots of washing and cleaning. An additional top coat will not hurt, although it isn’t necessary, it will add another layer of durability on top of Fusion Mineral Paint, however we find this is really only done for peace of mind more than anything.
Low traffic areas: Wardrobe, Side Table, Wardrobes, Dressers – essentially furniture not exposed to daily heavy washing/ cleaning. It is not recommended to add an additional layer of protection on these surfaces unless going for a specific look that a tinted wax or other top coat could add, Fusion Mineral Paint is more than durable enough. Add a top coat if you wish to enhance the look or change the sheen.
Stain & Finishing Oil All in One Wood Finish is Eco Friendly and easy to use. This stain & top coat combo offers exceptional durability in high traffic areas like table tops, kitchen cabinets and even flooring. Can be used on bare wood, or over previously painted surfaces for a faux effect. Use the Natural colour over Fusion Mineral Paint colours to increase the sheen and offer superior durability. This Stain and Finishing Oil All in One is your go to solution to bare wood to show off the grain, yet change the colour to your desire. Comes in 6 gorgeous colours. Very easy to use, low odour and Eco Friendly. Apply it with a brush, or rag, and wipe away the excess evenly within 10 minutes of applying.
If you have used Hemp Oil on a surface and wish to paint over it, there is no guarantee that you can. It must be fully cured, at least 14 days after application, clean with TSP Alternative and wipe down with Mineral Spirits/ Odourless Solvent before testing to see if the paint will adhere. If the paint separates upon application, do not try to continue painting it. You should use an Oil based conversion primer, then you can use Fusion Mineral Paint.
Using wax is a beautiful way to finish over low traffic painted pieces like dressers. Also works great on bare wood. It has been used for centuries as a hard-wearing wood finish. It does have it’s limitations in our modern world. It is not waterproof, it has some water resistance but for high traffic areas where water will be in contact with the surface, a harder wearing finish is more suitable.
To remove the wax use some mineral spirits and a rag or wire wool to remove. Once dry you can add a top coat of your choice. For a harder wearing coat, we would suggest using Stain and Finishing Oil.
Cleaning Wax or Hemp Oil from your brush is simple using some methylated spirit.
Hemp Oil can be added over Fusion Mineral Paint, however it is not going to add more protection, it will increase the sheen which will mean you will see less visible marks on the paint especially on dark colours. It adds very little protection but will increase the sheen ever so slightly ( this helps with darker colours, as they can sometimes mark, and tend to attract dust ) Hemp Oil can be applied with a rag or brushed on, but all excess must be removed immediately and buffed for best results. Any oil left sitting/pooling on the surface will create shiny and sticky patches.
Tough Coat can be used as a topcoat over wood. As it is water based it can sometimes raise the grain on the first coat due to the water content, just light sand after the first coat with a 240/300 grit will smooth the wood fibres ready for the second coat.
Over large surfaces our Tough Coat is best-applied with an applicator pad or a damp rag in thin multiple coats.
Wax is always last so you can indeed add it over the top of Tough Coat for decorative purposes. The tough Coat is much tougher than wax as a finish so it won’t add more protection but can up the sheen or add effects such as ageing or even a shimmer with the metallic waxes.
For a super ultra smooth finish, you can give your piece a final once over with a wet sanding technique. Here is a video on how to achieve this finish!
If you would like to up the sheen over your Fusion Mineral Painted piece, you can add a touch of Hemp Oil however we do not like to recommend this product as it is often applied and not fully removed. The paint must have good drying time first, at least overnight. Apply Hemp Oil and take a high grit 600 sanding pad and gently sand the area. Thoroughly remove excess oil with a lint free rag.
This exact same process can be done using water instead of Hemp Oil for a distressed matt effect.
Hemp Oil or our Beeswax Finish ( a pure beeswax blend with hemp oil)
Hemp Oil finish is a food safe natural wood finish. The rule of thumb is the older the wood the darker the finish could be. The newer the wood the less colour difference you will see. Works best on bare wood.
Here is more information.
Our Beeswax Finish provides the ultimate coat for your wooden kitchen tools – from cooking utensils to your butcher block. Our food-safe formula contains only pure beeswax and hemp oil – perfect for adding a durable satin finish. Food Safe, VOC-free, non-toxic, and biodegradable. HOW TO USE IT Apply liberally with a wax brush or lint-free rag. Allow the product to sit on the wood for 5-10 minutes, then remove any excess by buffing with your lint-free cloth.
For painted surfaces, gentle soap and water will do the trick!
For waxed surfaces, they do not like water so much as wax resists water.
If you want to use a gentle mix of water and soap, you will eventually remove the wax, so be sure to re apply if it looks dull.
The paint itself is water resistant, so no worries there! Be sure to wait at least the full 30 days for the paint to cure before trying to wash it.
Projects
What a fabulous way to transform the look of your house!
Fusion Mineral Paint is durable enough for exterior projects and will really make your front door pop!
A good cleaning is usually all you need to prepare your door for painting.
It does not matter if it’s wood, steel, or metal, you can clean them all with our TSP Alternative which will help get rid of dirt, grime, oil, and any sticky fingerprints. You don’t have to remove your door handles and locks in order to paint your doors. You can use painter’s tape to tape around them, the choice is yours.
Some people prefer a microfibre roller, while others are more comfortable using a brush. If you are worried about brush strokes, the key to not getting brush strokes is to paint in thinner coats, not thicker ones.
Please do note that the weather can affect dry times. Try to avoid painting on extremely humid days or days with extreme temperature changes or even very windy days to avoid paint splatter!
Do not paint below 10ºC / 50ºF
Do not paint above 30ºC / 86ºF
For a Pint of Fusion Mineral Paint and a few hour’s work, you get a gorgeous new look front door!
Here are some link we think you may find useful:
How To Paint Outdoor Furniture
How To Paint Your Front Door With Fusion Mineral Paint
Brush Strokes
Yes you can paint kitchen cabinets with Fusion Mineral Paint! We are covering all the basics you need to know to get started with how to paint kitchen cabinets. You can do this! The most important steps are Prep, ensure you thoroughly clean your cabinets with our TSP alternative to remove all grease. See below for more tips!
Pro Tips For Painting Kitchen Cabinets
Kitchen Makeover With Fusion Mineral Paint
How To Paint Melamine Or Thermafoil Kitchen Cabinets
Painting Kitchen Cabinets
Painting a fireplace/surround is easy with Fusion! Brick, stone and wood are excellent surfaces for updating with paint.
Here are a few tutorials showing you how:
How To Paint A Fireplace
How To Paint An Ornamental Fireplace
Although Fusion isn’t a floor paint many have had excellent success painting their floors.
Fusion has a built-in topcoat and is very durable, however if you wish for extra protection using our Tough Coat over lighter colours and our Stain and Finishing Oil over the darker colours will give you longevity. There are lots of examples over in our public group Paint it Beautiful.
Here is a link to a bathroom floor makeover using Fusion, the principles are the same.
Here is some more information about using Fusion Outdoors too.
Although Fusion Mineral paint is not a tile paint, lots of our community have had great success using it to paint tile!
There are lots of inspiration pictures on our public Facebook group Paint It Beautiful .
With the correct prep even tiles can be painted! Here is a blog post and a video showing you how with a supplies list of the things you will need.
In this video, Jennylyn goes through the steps to paint your backsplash/tile.
You can paint fabric with Fusion™! However, please note that not all fabrics are suitable. For example, fleece, terry cloth, or other plush fabrics aren’t recommended. It is always best to test prior to applying. The most successful types of fabric to paint on include cotton, vinyl, leather, polyester, etc. First, make sure to clean your fabric. If there are stained areas that change the texture of the fabric and absolutely cannot be cleaned, you may want to reupholster instead.
For your first coat, mix 1 part paint and 1 part water. Apply with a brush, just like normal. Sand it with a fine grit sand paper to soften it up and get rid of any stray fibres from the fabric underneath.
For your next coat, mix 1 part water and 2 parts paint. Sand again, and apply a final coat of 100% paint. If you are getting really good coverage, you may choose to skip the second coat and go straight to the final, all-paint layer. Sand again for a smooth finish. You can apply a wax as a top coat, but it isn’t necessary. The wax adds softness to the fabric and makes it feel smooth like leather. Apply a thin coat, buff, and you’re done.
You can also stencil on fabric. For this, be extra careful not to use too much paint because bleeding happens very easily with absorbent fabrics! To avoid this, push your stencil so that the fabric comes through the stencil. This will help keep your lines clean.
Another fun project is dip-dyeing or tie-dyeing with Fusion™! Just add a bit of Fusion™ to some water, and dye your fabric! This works really well with cotton. Once cured after 21 days (depending on weather conditions), your painted fabric is extremely washable! We recommend washing by hand with cold water and not with any other clothing items just in case any were to come off. Air dry. On the other hand, if you accidentally get paint on your clothing, wash it as soon as possible! For best results, scrub the affected area with brush cleaner and water, then wash it in your laundry machine as soon as you can.
Here is more information on painting fabric.
Painting Fabric With Fusion
Painting Leather or vinyl is easily done with Fusion Mineral Paint. It is always advisable to do a test patch in an inconspicuous area to make sure you are happy with the results before going ahead. Take a look inside our public group Paint It Beautiful, for lots of inspiration.
Good to note, sometimes the paint will had an odd reaction with certain Vinyl products and afterwards the surface can feel sticky/tacky. IF this happens you can apply a tough coat over top and it should resolve the issue.
Here is a link to a blog post all about painting leather/vinyl.
Updating a tired old leather armchair or even your old winter boots is a fun makeover! Cleaning with TSP Alternative is all that’s needed to transform old leather.
We have a blog on painting leather here you may find useful:
Painting Leather With Fusion Mineral Paint
Our products are not made for areas that will have a lot of water sitting on the surface for long periods of time, such as kitchen and bathroom countertops. With that being said many of our customers have had lots of success and you will be able to find examples of this in our public Facebook group Paint It Beautiful.
Fusion can be used to paint metal such as old hardware, or metal doors as long as there is no rust. If there is rust, be sure to use a rust inhibiting primer
Ensure you clean with TSP Alternative to ensure there is no grease which is common on metal, then paint it beautiful with Fusion!
Fusion is extremely durable and excellent for outdoors without a top coat!
Fusion is water resistant when cured after 21 days and UV stable which means your colour won’t fade in the sun!
When painting wood outdoors be sure that it is completely dry before painting. Paint all sides of your project to stop water from absorbing into the wood.
Social Media & Tutorials
We have a fabulous Instagram account for both Fusion Mineral Paint and Milk Paint by Fusion. The UK account is here.
We have interactive pages you can share content from for both Fusion Mineral Paint and Milk Paint by Fusion.
Get inspired here Fusion Mineral Paint and Milk Paint by Fusion.
With over 100 educational tutorial style videos, and new ones added monthly, visit our YouTube channel.
With over 100’s educational tutorial-style blogs, and new ones added weekly, visit our Blog.